Wednesday, January 21, 2015

Stuffed Pumpkin

I am a big fan of both of Anthony Bourdain's television shows. The Travel Channel still shows reruns of No Reservations and his current show, Parts Unknown, is on CNN. The way they dig deep into different cultures around the world through food is fascinating to me. Both shows are this beautiful balance of people, food, drink, a little politics, a little history, and the occasional crass comment or observation from Anthony.  I will be honest, you will experience a lot more drinking and crass comments while watching No Reservations, but it seems the folks at CNN took something good, polished up a little, and made it their own with Parts Unknown.

Not too long ago I was watching the Lyon, France episode of Parts Unknown, where Anthony and chef Daniel Boulud visit various restaurants and chefs around Lyon. But what really caught my interest was when chef Daniel took Anthony to the home where he grew up, to have a meal with his parents. One of the dishes they cooked was a stuffed pumpkin roasted in a brick oven. They hollowed out a pumpkin and put stale bread, cheese, mushrooms, bacon, and cream in it, put the lid back on, and slid it into their wood-fired brick oven. I immediately thought about doing something similar in my cooker.

So off to the grocery I went. I picked up a pie pumpkin because of their thicker flesh and higher sugar content. Since I didn't have any stale bread, I went with a nice blend of wild and whole grain rice. I grabbed some mushrooms, a red bell pepper, a sweet onion, and some baby spinach.  I also got some sausage with sage, sharp cheddar cheese, and heavy cream.

Back home in the kitchen, I began by cutting open the pumpkin and hollowing it out. Keep the pumpkin lid because you will need it later! I then browned the sausage and cooked the rice until it was almost done, but not completely soft.  I diced the onion and bell pepper and threw them in a pan with the mushrooms and a little butter and let them just begin to get tender. I left the spinach raw.  In a bowl, I mixed the rice, sausage, and vegetables, threw in a handful of the cheddar cheese, and then stuffed it all into the pumpkin.

I headed out to the cooker and brought the temperature up to about 325 degrees with a chimney full of white-hot lump charcoal.  I also added two chunks of pecan wood for a little smoke.

Just before I put the pumpkin on, I poured about half a cup of the heavy cream into the stuffed pumpkin and put the pumpkin lid back on it.  I put it on and let it cook for about an hour with the lid on.  I then removed the pumpkin lid and let it cook for about forty-five minutes until the skin was easily pierced with a fork.  I then took it off and let it cool for about 10 minutes.

To serve, I sliced the pumpkin from the top down into four to six sections and laid each section on a plate, skin down.  The stuffing rests nicely on top of each section of pumpkin.

Tuesday, October 14, 2014

Does Your Pork Have a Name?

I have always bought meat from the grocery store.  My wife and I are not very good at pre-planning and so it's always been convenient, as we are standing in the grocery store trying to figure out what to cook for dinner, to pick out something from the meat department.  Even when we decide to do barbecue or ribs, which takes a bit more time and planning, that decision is usually made while we are already at the grocery store.  And for the most part, I have been satisfied with the quality of the meat.  But I am here to tell you, I have just recently discovered another world of pork I never knew existed.

A good friend of mine is in the food distribution business and is a fantastic cook, so when we get together for dinner, the food is always over-the-top amazing.  A while back he mentioned that he had gotten, as he put it, "some high end, fancy pork" and he wanted to have us over for dinner.  He smoked a pork butt, his wife made some stupid good coleslaw and I brought over my smoked hobo beans.  As soon as I took a bite of the barbecue (no sauce of course) I could taste something different.  The flavor of the meat was rich and almost nutty and the fat was smooth and buttery.  I immediately wanted to know more about this "high end, fancy pork."  He explained that it was a Duroc hog, one of the heritage breeds.  He mentioned the names of a few more of the heritage breeds and explained a little about what a heritage breed hog was, and then the conversation moved on to laughing about the chicken named Collin from the show Portlandia.  

Berkshire hogs are the oldest of the heritage breeds.  
But I needed to know more about heritage breed hogs so as soon as we got home, I hit up the internet and began reading just about all there is to know about these unique hogs.  Turns out, there are a number of different pure breed hogs, each with distinct characteristics.  A few of the heritage breeds include Berkshire, Mulefoot, Tamworth, Large Black, Hereford, Poland China, Chester White, Duroc, Hampshire, and Yorkshire.  There is even a breed, the Ossabaw hog, that is unique to the Georgia island of the same name.  Many of these breeds are considered a threatened species and so they can be hard to find.  Many tend to be smaller than grocery store hogs because they are raised on a natural diet with no hormones and never see the inside of a gestation crate.  Instead, they are free range hogs that live a stress-free life, making their meat all the better.  Their fat tends to be smooth and buttery when rendered and their meat is a much deeper red than the pale pink of grocery store meat, offering a flavor that is hard to beat.

My local butcher has Chester White hogs raised in NC.
The next day I paid a visit to my local butcher to ask about the pork that he had available.  He explained that his pork comes from a farm in North Carolina where they raise Chester White hogs.  Since then I have smoked five racks of baby backs and two pork butts and it truly has been the best ribs and barbecue I have ever done.  The price is only about a dollar a pound more and it is well worth it.  So from now on, there will be no grocery store swine for me.  The only pork to see the inside of my cooker is pork I can call by name!                             

Monday, July 21, 2014

The Search is Finally Over

As you all know, this blog has never been a place where I do restaurant reviews.  I am not a food critic nor have I ever claimed to be.  I prefer to share with you my stories and experiences cooking with wood in the backyard, hoping to challenge and inspire each of you to try something new on the grill. 

But over the past couple of months I have visited a few of the local barbecue restaurants hoping to learn something new about cooking with wood or at least walk away with a few new ideas for food I can cook on my grill at home.  And something very unexpected happened.  Instead of leaving inspired, I was left dumbfounded and disappointed.  These restaurants, which had been recommended by a number of people, were serving food that was just not good.  Ribs with no flavor, dry brisket reheated on the flat top, and vinegary mush that they were claiming to be pulled pork.  It just seemed that no one around here knew anything about cooking food with wood, until today.

A couple of weeks ago, as I followed my wife to the Honda dealership at 7:15 in the morning to drop off her car, I passed Swig and Swine and noticed smoke coming from the cooker out front.  I thought to myself. "Cooking at 7:15 in the morning seems pretty legit, I definitely need to try that place."  Well, today I ate there for lunch and I am sorry I didn't do it sooner.  I had the three meat plate with pork belly, turkey, and pulled pork and it was amazing.  I had collards and mac and cheese for sides and they were spot on too.  

Lucky for me, I was able to talk with partner and executive chef, Anthony DiBernardo, and he was gracious enough to share a little about how he is able to create such fantastic food.  From using only hickory, oak and pecan in his custom made, reverse flow cooker to using salt and pepper as the primary seasonings, this guy was speaking my language.  By keeping it simple and letting the wood do the work, the folks at Swig and Swine have a great thing going.  Meat cooked the right way, sides that are to die for, quality beer on tap, and fast, friendly service are what make this place so great.  If I'm not cooking it at home, I'm eating it at Swig and Swine!            


Thursday, July 10, 2014

What's Been on the Grill?

Most people would agree that summer is the best time to grill.  Although the evenings are hot here in the Lowcountry, the beverages are cold which means there really is no better time to cook with wood.  It stays light until almost nine, so there's plenty of time to sit on the back porch under the ceiling fan and enjoy the evening with good food and good friends.

Brussels sprouts in a cast iron skillet with olive oil, salt, and pepper.
There's been quite a variety of foods on my grill this summer.  The late spring, early summer is a great time for brussels sprouts and a cast iron skillet over fire is the best place to put them.  I toss them in a little olive oil, season them with salt and pepper, and cook them over a white-hot bed of lump charcoal with a couple of chunks of hickory.  The sprouts do very well with a little smoke flavor.


Corn grilled in the husk rubbed with a little butter.
One of the first things many of us cooked on the grill, whether with gas or charcoal, are hamburgers.  And I know there are millions of ways to do burgers on the grill, but I prefer ground chuck.  I make my patties big, but not too thick.  If they hang off the bun they're perfect!  I season them with a little salt, pepper, and cumin, and grill them over direct heat with lump charcoal and hickory chunks.  I flip them once and add a couple of pieces of bacon, a slice of sharp cheddar, and a slice of colby jack.  My kids describe them as "burger perfection!"


Folks come running when these are on the grill.
I'm always looking for a new appetizer I can throw on the Weber while the main dish is cooking on the big cooker.  A friend of mine found these gems and sent me the link to the recipe.  I just slice a sweet onion into rings, but instead of battering and frying them, I wrap them in bacon and grill them over direct heat until the bacon gets crispy.  To help keep them together, double up the rings.  This keeps them from getting too flimsy as they cook.


Sweet potatoes brushed with olive oil, seasoned with salt, and grilled.
It's been years since I have smoked a whole chicken.  So this Fourth of July I decided to do a couple of beer can chickens.  I brined these two birds overnight in a brine recipe from Alton Brown.  And then right before I put them on to cook,  I read an article about how the beer can chicken thing is a myth and a waste of good beer.  So I used the beer can holders to prop the birds up and smoked them at 325 degrees, without the beer can, until the internal temp of the breasts reached 165 degrees.  I then took them off and let them rest for about twenty minutes before I cut them and served them.  Best chicken ever!        

Wednesday, April 30, 2014

Meatloaf Bliss

Being a newlywed is a funny thing.  It's been a long time since my wife and I were marriage rookies, but as I think back to those early days, I can't help but remember it being a little awkward at first.  Although we dated for almost two years before getting married, we never lived together until after the wedding and so it felt a little like getting a new roommate in college. It took us a little while to figure out how to live together.  Who will do the laundry?  Who will do the yardwork?  What really is the right way to put lights on the Christmas tree?  I am messy, she is not.  Who will do the grocery shopping? Who will pay the bills?  What are we having for dinner?

What are we having for dinner?  A question that is still asked everyday in our house.  But back then, she and I quickly realized that each of us had a couple of meals that we could cook fairly well.  I had a little gas grill (amateur!) and could do burgers and steaks and every now and then a juicy piece of chicken.  I could also do spaghetti.  She had a bunch of her mom's casserole recipes, she could do lasagna (to this day it's the best lasagna I've ever had!) and she could do meatloaf.

I will never in my life forget the first time she ever cooked meatloaf.  I came home one evening to a loaf of meat cooking away in the microwave.  "Huh," I thought to myself.  "I've never seen meatloaf cooked in the microwave before."  But I went with it and to be totally honest, it tasted pretty good.  Apparently, that's how her mom had always cooked meatloaf.  But there was just something weird about cooking meatloaf in the microwave.

Fast forward a few years, the two of us had become fairly comfortable in the kitchen and we were having fun trying new dishes and playing around with recipes we found on the web.  One day my wife mentioned cooking meatloaf and I suggested we try something different.  I had just had a conversation with a guy at our church earlier in the week about meatloaf and he talked about how he used Ritz crackers instead of bread crumbs and it sounded excellent so I figured this might be the right time to take our meatloaf in a different direction (like towards the oven and away from the microwave!).  This began our journey to meatloaf perfection!

From the microwave, to the oven, and eventually to the grill, we just kept making it better, each time changing things up a little.  Less ketchup, more mustard, more crackers, less crackers, onions, bell peppers; you name it, we've tried it.  For a little while we were even wrapping the entire thing in bacon.  And eventually, after almost eight years of tinkering with one of America's most classic meals, we have achieved what our family considers Meatloaf Bliss.

In a large mixing bowl, combine two and a half pounds of ground beef, two eggs, two sleeves of crushed Ritz crackers, one sixteen ounce container of Garden Fresh Thick and Chunky Salsa, one can of strained and rinsed black beans, one can of strained and rinsed sweet corn, three tablespoons of mustard and two tablespoons of Worcestershire Sauce.  Divide the mix into two loaves and place the loaves on a cookie sheet and chill in the fridge for about thirty minutes.

While the loaves are chilling, fry half a pound of bacon and break the pieces up into bacon crumbles.  Then head out to the grill and get it set up for cooking with indirect heat.  Bring the grill temp up to 350 degrees and add a couple of chunks of hickory or pecan.  Before placing the loaves on the grill, top each loaf with a couple of handfuls of light brown sugar and the bacon crumbles.  You may have to lightly press the bacon crumbles into the loaves so they will stay in place.

Cook the meatloaves at 350 degrees until they reach an internal temperature of 165.  Remove them from the grill with a large spatula and let them rest for about twenty minutes before serving.

Thursday, March 27, 2014

Why Do I Cook With Wood?

I spend a lot of time cooking outside.  I also spend a lot of time talking with people about cooking food outside.  In fact, the only thing I love more than eating food cooked on the grill is sharing ideas, techniques, and stories with others about cooking with wood.  And in those conversations, many people ask the same questions.  "Wouldn't it just be easier to cook it in the oven?"  "Wouldn't it be quicker to cook on a gas grill?"  "Is it really necessary to cook everything on the grill?"

No, it's not necessary to cook everything on the grill but there are a couple of good reasons why I choose to cook most things on the grill.  First and foremost, I believe the food just tastes better. I find that the natural flavor that comes from wood is very appealing.  Does that mean that all food from my grill is super smoky in flavor?  Absolutely not.  Knowing when, how much, and what kind of smoke wood to add to your pile of hardwood lump charcoal is just as important as knowing what kind of seasoning works best with the dish you are creating.  The wood is part of the recipe.

Second, I like the challenge.  It is not easy getting a fire going and then manipulating the airflow through the cooker in order to dial it in to the perfect temperature.  It is something that takes a bit of practice but the more you grill, the better you know your cooker and can better achieve the exact temperature needed for the particular dish you are cooking.  

But even more than both of the previous reasons, I cook with wood because it takes time.  Cooking on the grill provides me with an excellent excuse to take a break from the rat race of life, stand on my back porch, enjoy a good beer, and create amazing food.  I truly believe that the greatest things in life take time.  If you don't invest time in your marriage, it will suck.  If you don't spend time with your kids, they will find other ways to spend their time.  If you don't set aside time to volunteer somewhere serving others, your life will be without meaning.  Food deserves our time too!

But I have failed.  I could come up with a hundred reasons why I haven't posted anything on this blog in well over a month; it's been cold,  it's been rainy, this is a busy time of year, it was getting dark too early; the list goes on and on.  But if I'm honest with myself I know the reason I haven't is because I haven't been intentional about making the time to do it.  It's that simple.

In the coming weeks I will be doing a better job of making time for the things that are important and for my family and me, food is one of those things.  I will be sharing with you the story of my wife's meatloaf and its journey from the microwave to the grill, I'm going to spend some time talking about hamburgers done the right way, and I will be cooking for a friend's birthday party and hope to get some great pictures of nachos, fajitas, and quesadillas on the grill.  I also have this little dream to soon begin selling my fajita seasoning, pork butt rub, rib rub, and house seasoning.  There's plenty of hoops to jump through before that happens but I'm going to try to get the ball rolling.

I am looking forward to a spring filled with the smell of smoke and good food and friends to share it with.  The Lowcountry really is an amazing place to live and am going to do everything possible to make time to enjoy it!

Tuesday, February 4, 2014

Cajun Monterey Ranch Chicken Wings


A couple of weeks ago I was poking around on the internet, trying to find something new and unique to cook for Super Bowl Sunday, when I came across a mind-blowing statistic. According to the National Chicken Council, North Americans will eat 1.25 billion wings on Super Bowl Sunday.  That's four wings for every person in this country.  It was immediately clear, I had to cook my chicken wings I had spent so long working to perfect.  You see, in 1995, we lived next-door to a guy named David. David had a tradition of cooking hot wings for the Daytona 500 and for years I watched in amazement as he crafted some of the best wings I have ever tasted.  Inspired by his masterpiece, I have spent the last several years sharpening my skills,  trying to create a wing recipe that is worthy of David's Daytona 500 bone-sucking wings.  

  
It all starts with two, four-pound bags, of wings.  I load my Primo Oval XL with about three handfuls of lump charcoal and four hickory chunks.  I have found, for a cook like this where I'm not trying to go low and slow, I use a handheld torch to light four different spots in my pile of lump.  I then place the chunks of hickory in the four spots that are not lit.  That way, I can bring the temp up without burning up my smoke wood.  I then drop my diffuser stones into place, put down my grates, clip my thermometer sensor to the grate, and close the lid.  I then bring the temp up to 300 degrees.  


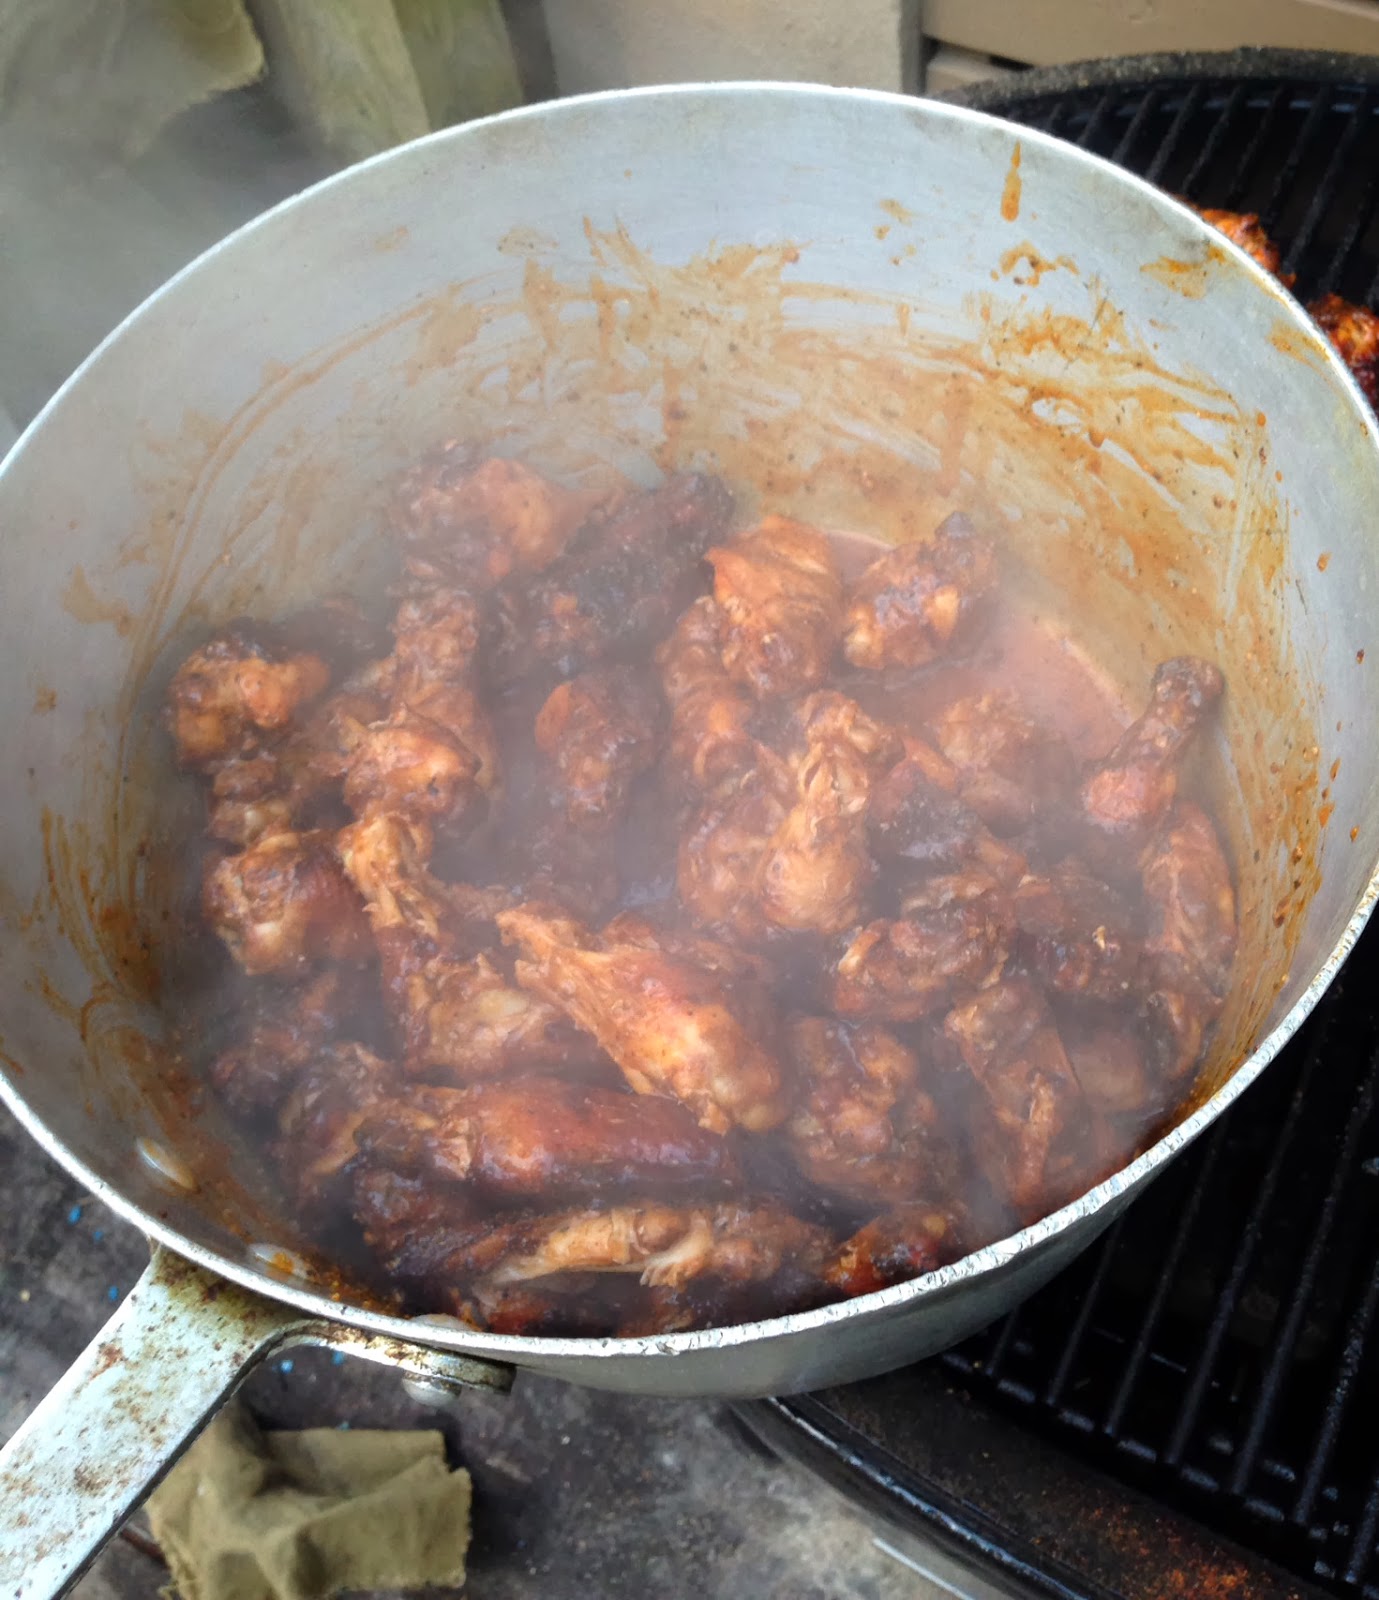
The trick to these wings is it involves a three-part flavoring process.  Begin by putting the wings on the grill and sprinkling on Swampy's Cajun Seasoning.  Let them cook for about thirty minutes and then flip.  Then sprinkle on the Monterey Ranch seasoning mix.  It is made up of a combination of Grill Master Monterey Seasoning and a packet of Hidden Valley Ranch Seasoning.  Cook the wings for thirty more minutes then soak them in a Texas Pete buffalo wing sauce.  Melt 1/2 stick of unsalted butter with the buffalo sauce. 


Put the wings back on the grill, to tighten them up, for an another ten minutes or until your desired crispiness.  At this point, it's perfectly fine to check on them frequently and take them off when the color and crispiness is where you want it.

Serve the wings with ranch, blue cheese and enjoy.

Thursday, January 30, 2014

Baby Back Ribs

I will never forget the first rack of ribs I smoked.  My best friend's brother was in town for Halloween and so we decided to smoke some ribs.  I had no clue what I was doing and I didn't bother reading anything about how other folks cooked ribs.  I mixed up a "rib rub" that I thought would be good, fired up the offset smoker box on my new horizontal cooker (I had just brought Mr. Draper's Grill back from Gulfport a month before), and we got to cooking.  We coated the ribs with our homemade rib rub and put them on the grill.  I remember adding a TON of hickory chunks to the fire so we would "get a good smoke."  I don't remember ever checking the temperature, or how long they cooked.  All I know is they cooked for a while, we added more hickory chunks so we would continue to "get a good smoke" and then we left to take my three daughters trick-or-treating.  When we got back, we took the ribs off and brought them in the house.  Now, you have to understand, my memory of that first rib cooking experience is a little fuzzy.  It was almost ten years ago, I didn't take any notes, and I really had no idea what I was doing.  But that first bite of rib has been permanently infused in my memory.  As I tried to sink my teeth into the leathery, smoky meat, I remember thinking to myself, "Ugh, I thought ribs should fall off the bone."  As I continued to pull and tear the meat from the bone, the heat hit me.  With tears streaming down my cheek, it occurred to me that I might have gone a little overboard with the red cayenne pepper in my "rib rub."  As I looked around, the faces of my buddy and his brother told the exact same story.  Fighting through the heat induced tears and sniffles, we gnawed and tore our way through two full racks of our first baby back ribs.  In the days that followed, I spent hours scouring the internet for tips and tricks on rubs, cooking technique, and sauces.  This was the beginning of my journey into the world of cooking ribs.

After almost ten years of tinkering with baby back ribs, both on a horizontal cooker and now on a kamado cooker, I think I'm pretty close to getting them dialed in.  My wife and children love them and I've never had any complaints from friends either.  For me, it all starts with the rub.  Like most of the rubs and seasonings I've created, I began by looking at a bunch of different recipes, some very complicated and some very simple, and then used the basics from those recipes as a place to start.  From there I experimented with different spices until I found a combination that I liked that also worked well with my sauce of choice, Williamson Brothers Barbecue Sauce.  My rib rub has a light brown sugar base and also includes dry mustard powder, onion powder, garlic powder, cayenne pepper, kosher salt and coarse ground black pepper, cumin, dried basil leaves, ground cloves and chipotle pepper.  After scoring the underside of the ribs with a knife, I give the ribs a good coating of rub, top and bottom.  I then head out to the grill and get the fire started.  I add a couple of chunks of hickory to the pile of lump charcoal, get my diffuser stones in place, and bring the temp up to between 250 and 275 degrees.  I try to stay closer to 275 but I'm perfectly happy anywhere in between.  

As I was doing my rib research years ago after our epic failure, I kept seeing folks refer to the 3-2-1 method for cooking ribs.  Basically it's three hours on the grill, two hours on the grill wrapped in foil, and then one more hour back on the grill without the foil.  Usually folks add liquid like beer or vinegar to the foil pouch during the middle two hours and then brush with sauce during the last hour.  For me, this was a great place to start.  As I experimented with different cook time combinations, there were instances where I undercooked them and the bone did not pull clean.  There were also times when I overcooked them and the meat had a mushy texture.  I have now tweaked it so that when they are done and have rested there is a clean rib bone but still a nice texture to the meat.  

For the first part of the cook, I let the ribs stay on about two-and-a-half hours.  I then wrap them in a foil pouch, add a little apple cider vinegar, and put them back on for about an hour.  I then unwrap them, brush them with Williamson Brothers Original, and put them back on for about another forty-five minutes.  I then take them off and let them rest for fifteen or twenty minutes in a cool oven.  

After brushing the ribs with your favorite sauce, putting them back on the grill for a little while will tighten them up and give them that beautiful mahogany color.  The smaller rack in the back is ready to come off but the larger rack needs a few more minutes to finish.  
    

Tuesday, December 10, 2013

Apricot Glazed Pork Loin Roast

The perfect balance of sweet, savory, and smoky.
My wife found this recipe last year in a cookbook called Best-Loved Holiday Recipes published by Meredith Corporation.  We had volunteered to host the staff Christmas party and she decided she wanted to try something new.  So she he pulled out this cookbook for the first time ever and thumbed through the pages until she came across this recipe.  When she said she wanted to try it I was a little worried because it was only a couple of days before the party, we were responsible for providing the meat, and I am not a big fan of cooking anything for the first time for an event.  But I have to say, it turned out amazing.  The first couple of times we made this dish we did it in the oven.  That's the way the recipe was written and my wife enjoyed cooking it in the oven.  Only when she suggested doing it on the grill did I jump at the chance to take this pork loin roast to the next level.  Smoke adds one more layer of flavor to an already incredible piece of meat. Honestly, the rub is what I like most about this recipe.  It makes the whole house smell like the holidays and it works perfectly with the apricot glaze.

Internal temp should read 135 degrees
Rub Recipe
One 3-pound boneless pork loin roast
One and a half teaspoons ground cumin
Half teaspoon garlic salt
Half teaspoon ground cinnamon
Half teaspoon ground ginger
Quarter teaspoon ground cloves

The Glaze
One cup of apricot preserves and three tablespoons of white wine vinegar.

Mix together all of the spices and rub generously over the entire pork loin.  Wrap it up in plastic wrap and let it chill in the fridge for a couple of hours.  Bring your grill temp up to 325 degrees, add a couple of chunks of hickory, remove the plastic wrap, put the pork loin on the grill, and let it cook over indirect heat until the internal temp. reads 135 degrees.  Should take about an hour or so.  

With about ten minutes left until the pork loin reads 135 degrees, preheat your oven to 325.  In a small sauce pan cook the apricot preserves and vinegar over medium heat until the preserves are melted, stirring frequently.  Remove from heat.  With the pork loin now off the grill, place the meat on a broiler pan and brush generously with the glaze.  Roast it in the oven for about 15 minutes.  Remove it from the oven and let it rest for about 15 or 20 minutes.  Slice it, brush on the rest of the glaze, and serve.    


Sunday, December 8, 2013

Thanksgiving on the Grill

War Damn Eagle!!!
Thanksgiving in our house is always pretty low key.  We very rarely travel, instead staying home to spend time together, just the five of us.  There are two parts to our Thanksgiving; we always cook a big meal together on Thanksgiving Day and then our focus shifts to the Iron Bowl on Saturday.  As Auburn fans, our house went crazy after that game, the remnants of toilet paper in our oak tree the only remaining evidence of our celebrations. Our win over that other team was one for the history books and was just about the only thing anyone wanted to talk about this past week.  

The other thing everyone wants to talk about after Thanksgiving is food.  I always love listening to people talk about the different dishes they served because many times the recipe is an old family recipe that's been made every Thanksgiving for years.  Ours is the same but this year we decided to change it up a little and cook all of those family recipes on the grill.  From the pecan and pumpkin pie to the cornbread, sweet potato casserole, and apricot glazed pork loin roast, we cooked it all with wood.  

When talking with folks this past week about cooking Thanksgiving on the grill everyone had the same question, "How?"  I'll tell you the same thing I told them, anything you'd cook in the oven you can cook on the grill.  It's all about temperature control.  As long as you know your grill well enough to know how to control the temperature, you can cook almost anything on the grill.

Grills have vents that control air flow which, in turn, control the temperature.  The more air you give the fire, the higher the temperature.  Whether you're cooking on a horizontal cooker, a kettle grill like a Weber, or a Kamado style cooker, they all have a vent to let air in and a vent to let air out and you can find the right combination of openings to keep the temperature wherever you need it to be.  Now, I understand that keeping the temperature constant for an extended period of time like eight or ten hours is easier on some cookers and really tough on others, but for dishes that require an hour or less, cook it on the grill!

In order to keep accurate control of the temperature, the most important piece of equipment you need is a good quality, digital thermometer with a sensor that sits at grate level.  This way you always know what is going on inside your grill without opening the lid.  I can't say enough about how much having a good thermometer will change the way you grill.

It all takes practice.  Nobody gets it right the first time.  Not even the second.  I still screw up food all the time but I learn from my mistakes and move on.  But having the right tools and knowing your grill can allow you to do some amazing things cooking with wood.  Don't be afraid to get creative. 

 Remember, if you'd cook it in the oven, you can cook it on the grill!             
                 

Monday, November 25, 2013

Fajita Butt Tacos

A while ago I decided it was time to create my own fajita seasoning. I had tried a couple of the store bought fajita spice mixes to season the chicken cutlets for my quesadillas but I just wasn't satisfied.  So I went online and searched "fajita seasoning" and looked through a bunch of different recipes.  Most of them were very similar and included salt, paprika, chili powder, sugar, garlic powder, onion powder, and usually cayenne pepper for some kick.  To the pantry I went, hoping I wouldn't have to make a trip to the store.  We had everything but the chili powder so I improvised and used the chipotle pepper spice I already had instead of going to the grocery store for chili powder. I also added black pepper and cumin.  After a little bit of tweaking here and there, this has become my go-to seasoning for the chicken, shrimp and steak that goes into tacos, quesadillas, nachos, and any other mexican/southwestern dish.

Then, a couple of weeks ago, I had another stroke of genius.  I was watching some barbecue competition show on tv and as each of the competitors was generously coating their huge cut of pork with their own special spice rub, I immediately thought of my fajita seasoning and wondered what it would be like on a smoked pork butt.  I had to try it!  So this past weekend I picked up a little four pound pork butt roast.  I gave it a good coating of my fajita seasoning, wrapped it in plastic wrap, and let it sit in the fridge overnight.  The next day I threw it on the smoker and let it go all day until the internal temp reached 200 degrees.  I let it rest for about an hour and then pulled it to be used in tacos.

While the butt was still resting, I put together a salad/relish kinda thing I discovered last summer in Honduras.  In a large mixing bowl I combined a bag of cole slaw, a diced red bell pepper, chopped fresh cilantro, the juice from one lime, and a little vinegar.  I seasoned the mix with salt, pepper, and cumin, and gave it a generous toss, making sure everything was mixed very well.  This stuff is even better the next day so I prefer to make it a day in advance so that the ingredients can hang out together in the fridge (I'm just not very good at planning ahead, didn't happen this time!).    

Once the fajita butt has rested and been pulled, I put a handful of it in the middle of a flour tortilla and top it with the Honduran salad.  These tacos are ridiculous!!!                 

Monday, November 18, 2013

Armadillo Eggs Down and Dirty

Down and dirty puts a perfect crisp on the bacon
The other day I was watching a show called Deep Fried Masters on Destination America.  It's a cooking competition that puts State Fair Vendors up against each other to see who is the real deep fried master.  I'm not a huge fan of the "deep fry everything" craze, in fact I think it's a little absurd, but that's what was on and just before I changed the channel, a particular dish caught my attention.  For the "food on a stick" category one of the competitors was cooking what he called Deep Fried Armadillo Eggs.  As I watched him assemble these little guys and drop them in the fryer, my first thought was, "Those look stupid good!" which was immediately followed with, "Those would be perfect to do down and dirty."

Soak the skewers in water to keep them from burning
This particular version of Armadillo Eggs consists of three ingredients, a block of pepper jack cheese, boneless, skinless chicken breasts, and bacon.  Start by slicing the chicken breast into pieces about an inch think.  Then, pound the chicken out until it is about four inches in diameter and about an eighth of an inch thick.  Season with salt, pepper, and cumin.  Wrap each piece of chicken around a small chunk of cheese, wrap the cheese and chicken with a slice of bacon, and use a bamboo skewer to hold it all together.

My new favorite food on a stick
Light a chimney starter full of hardwood lump charcoal and let it get white hot.  Dump the coals into your down and dirty cooker (see Cooking Down and Dirty) and then place a wire cookie cooling rack directly on the coals.  Blow off the ashes and then place the Armadillo Eggs down on the coals.  Flip the eggs a couple of times so everything cooks evenly.  Take the eggs off the coals when the bacon shell gets nice and crispy.  Let them rest for a couple of minutes before serving.                       

Monday, November 11, 2013

Banana Bread

Pecans + smoke = stupid good!
As my wife and I began exploring different things to do on the grill, her banana bread recipe was one of the first sweets we decided to try.  Pecans handle smoke well and so we figured this recipe might work. Well, let me tell you, we were right!  We've done muffins and bread and both do a great job of capturing just enough smoke to give it an unbelievable flavor.

Mix the following together in a large mixing bowl:

1 cup of sugar
1/2 cup of brown sugar
1/2 cup of softened butter
2 eggs
2 tablespoons milk
1 teaspoon baking soda
2 cups of all purpose flour
3 bananas, over ripened
1 teaspoon vanilla
1/2 teaspoon of salt
couple of handfuls of chopped pecans

Light a chimney full of hardwood lump charcoal and let it get white hot.  Dump it into the grill and add three or four chunks of hickory or pecan wood.  Bring the temperature up to 350 degrees.  Rub the inside of a loaf pan with butter and lightly dust with flour.  Pour in the mixture until the loaf pan is half full and sprinkle another handful of pecans on top.

So that the bread will cook evenly, I always cook with indirect heat using my stone diffuser.  Let the banana bread cook for at least 45 minutes before checking on it.  It may take an hour or so to cook so when a toothpick stuck in the middle comes out clean, take it off the grill and let it cool for about ten minutes before removing from the pan.

Sunday, November 3, 2013

Pecan Mozzarella Chicken

Grilled chicken breast can be tricky; it just takes practice.
Boneless, skinless chicken breasts are notoriously hard to grill.  Trust me, I have dried out more chicken in my backyard (and made my kids eat it anyway) than I care to admit.  Honestly, the trick is to learn from your mistakes and don't be afraid to fail.  Because when you get it right, it's freakin' magic!

Like many people, my first experiences with grilling were on a gas grill.  At the expense of irritating a lot of people, I'm saying right here and now, cooking on a gas grill is no good.  Gas has no flavor and it sucks the moisture out of even the best cuts of meat.  That's just my opinion based on my experiences. It was only when I ditched the gas and started cooking with charcoal did I realize what I was missing.  My burgers had more flavor and my chicken wasn't as dry. 

Through trial and error, I have discovered that chicken breasts are done best by cooking with indirect heat.  When I would cook on Mr. Draper's grill (the horizontal grill rescued from the rubble of Hurricane Katrina), I would put the coals on one side and the meat on the other.  Now, cooking on my Akorn, I use the stone diffuser.  Either way, the chicken is never sitting over direct flame.

Vegetables like asparagus always taste better with a little smoke.
Start by giving the chicken a light scruffing and then season it with salt, pepper and cumin.  Light half a chimney starter of hardwood lump charcoal and let it get white hot.  Dump it into the grill, add a couple of chunks of hickory or pecan wood, and bring the temp. up to between 325 and 350 degrees.  In a bowl, mix a couple of handfuls of chopped pecans and a little barbecue sauce together for the topping.  Use just enough barbecue sauce to coat all of the pecans and help them stick together.  You don't want the topping to be too runny.   

Put the chicken on and let it cook for eight to ten minutes.  Flip the chicken and baste it with barbecue sauce.  After another eight to ten minutes, flip it and baste it again.  You can flip and baste a couple of times, allowing the chicken to build a good layer of flavor.  The last time you flip and baste, make sure the underside of the breast filets are facing up.  The topping won't stay on otherwise.  Add a small amount of the topping to each piece of chicken and then finish with a sprinkle of mozzarella cheese.  When the internal temperature of the chicken has reached 165 degrees, take the chicken off the grill and let it rest for ten minutes before serving.

 This chicken can be served with just about any of your favorite sides.  This time around I went with asparagus.  I put it on the grill when I first put the chicken on and let it cook for about ten minutes or so.  I left it on just long enough for it to start to become tender.  I then took it off and set it aside.  While the chicken was resting, I finished the asparagus in a non-stick pan with a little melted butter.  I tossed the asparagus in the butter, added a little salt and pepper, and then drizzled on a little honey.


Wednesday, October 23, 2013

Smoked Nachos

It's the smoke that takes these nachos to the next level.
It's hard to find anyone who doesn't like nachos.  Whether you prefer simple cheese nachos or you like to put everything but the kitchen sink on a pile of chips; nachos just work.

In our house of five, it's hard to please everyone when it comes to food.  We cook a lot of truly good food and I am always astonished when one of my daughters tries to act like she doesn't like what we've cooked.  But I can pull these nachos from the grill, set them in the middle of the table out on the back porch, and step back and watch the pizza stone get picked clean, all the way down to them scraping up the burnt cheese with a fork.    

I start these nachos by generously seasoning four or five chicken breast cutlets with a fajita spice blend.  In a preheated, non-stick frying pan I melt a chunk of butter and then cook the chicken five or six minutes per side.  Since the chicken cutlets are sliced thin, be sure not to over cook the chicken or it may dry out.  Once done, set the cooked chicken aside to rest.  

In a bowl, combine one diced tomato and a can of strained and rinsed black beans.  Squeeze the juice from one lime into the tomatoes and black beans and mix together, being careful not to over mix and crush the black beans.  Chop some fresh cilantro and put into another bowl.  Fill a third bowl with the chicken, sliced into bite-sized pieces.  This is the fun part of making nachos because you can pretty much put whatever you want on them.  For us, the tomatoes, black beans, cilantro, and chicken all work well together, but I have a feeling we will be experimenting with all kinds of different toppings.  I melted cheese in the microwave over a bowl of chips and the sausage and scrambled eggs leftover from the buffins we made the other day.  I think I might be on to something.  I am definitely going to try some sausage, egg and cheese breakfast nachos on the grill sometime soon!  The point is, just have fun with it and be creative.   

Along with a bag of your favorite nacho chips and shredded cheese, head out to the grill with the toppings and begin getting the coals ready.  Light half a chimney starter of hardwood lump charcoal.  When it is white hot, dump it into your grill and add four good-sized chunks of hickory or pecan wood.  You want a lot of smoke.  Place your pizza stone on the grill grate and begin building the nachos.  Start with a layer of chips and then a handful of chicken, tomatoes and black beans, cilantro and then cheese.  Add another layer of chips followed by another layer of toppings and cheese.  Finish with one more handful of cilantro.  Close the lid and let them cook for three to five minutes.  Have a hot pad or two in place where you want to serve the nachos because the stone will be hot.  When the cheese is melted and has just begun to brown on the stone, take the nachos off the grill using oven mitts.  Serve the nachos directly from the pizza stone.