Wednesday, January 21, 2015

Stuffed Pumpkin

I am a big fan of both of Anthony Bourdain's television shows. The Travel Channel still shows reruns of No Reservations and his current show, Parts Unknown, is on CNN. The way they dig deep into different cultures around the world through food is fascinating to me. Both shows are this beautiful balance of people, food, drink, a little politics, a little history, and the occasional crass comment or observation from Anthony.  I will be honest, you will experience a lot more drinking and crass comments while watching No Reservations, but it seems the folks at CNN took something good, polished up a little, and made it their own with Parts Unknown.

Not too long ago I was watching the Lyon, France episode of Parts Unknown, where Anthony and chef Daniel Boulud visit various restaurants and chefs around Lyon. But what really caught my interest was when chef Daniel took Anthony to the home where he grew up, to have a meal with his parents. One of the dishes they cooked was a stuffed pumpkin roasted in a brick oven. They hollowed out a pumpkin and put stale bread, cheese, mushrooms, bacon, and cream in it, put the lid back on, and slid it into their wood-fired brick oven. I immediately thought about doing something similar in my cooker.

So off to the grocery I went. I picked up a pie pumpkin because of their thicker flesh and higher sugar content. Since I didn't have any stale bread, I went with a nice blend of wild and whole grain rice. I grabbed some mushrooms, a red bell pepper, a sweet onion, and some baby spinach.  I also got some sausage with sage, sharp cheddar cheese, and heavy cream.

Back home in the kitchen, I began by cutting open the pumpkin and hollowing it out. Keep the pumpkin lid because you will need it later! I then browned the sausage and cooked the rice until it was almost done, but not completely soft.  I diced the onion and bell pepper and threw them in a pan with the mushrooms and a little butter and let them just begin to get tender. I left the spinach raw.  In a bowl, I mixed the rice, sausage, and vegetables, threw in a handful of the cheddar cheese, and then stuffed it all into the pumpkin.

I headed out to the cooker and brought the temperature up to about 325 degrees with a chimney full of white-hot lump charcoal.  I also added two chunks of pecan wood for a little smoke.

Just before I put the pumpkin on, I poured about half a cup of the heavy cream into the stuffed pumpkin and put the pumpkin lid back on it.  I put it on and let it cook for about an hour with the lid on.  I then removed the pumpkin lid and let it cook for about forty-five minutes until the skin was easily pierced with a fork.  I then took it off and let it cool for about 10 minutes.

To serve, I sliced the pumpkin from the top down into four to six sections and laid each section on a plate, skin down.  The stuffing rests nicely on top of each section of pumpkin.

Tuesday, October 14, 2014

Does Your Pork Have a Name?

I have always bought meat from the grocery store.  My wife and I are not very good at pre-planning and so it's always been convenient, as we are standing in the grocery store trying to figure out what to cook for dinner, to pick out something from the meat department.  Even when we decide to do barbecue or ribs, which takes a bit more time and planning, that decision is usually made while we are already at the grocery store.  And for the most part, I have been satisfied with the quality of the meat.  But I am here to tell you, I have just recently discovered another world of pork I never knew existed.

A good friend of mine is in the food distribution business and is a fantastic cook, so when we get together for dinner, the food is always over-the-top amazing.  A while back he mentioned that he had gotten, as he put it, "some high end, fancy pork" and he wanted to have us over for dinner.  He smoked a pork butt, his wife made some stupid good coleslaw and I brought over my smoked hobo beans.  As soon as I took a bite of the barbecue (no sauce of course) I could taste something different.  The flavor of the meat was rich and almost nutty and the fat was smooth and buttery.  I immediately wanted to know more about this "high end, fancy pork."  He explained that it was a Duroc hog, one of the heritage breeds.  He mentioned the names of a few more of the heritage breeds and explained a little about what a heritage breed hog was, and then the conversation moved on to laughing about the chicken named Collin from the show Portlandia.  

Berkshire hogs are the oldest of the heritage breeds.  
But I needed to know more about heritage breed hogs so as soon as we got home, I hit up the internet and began reading just about all there is to know about these unique hogs.  Turns out, there are a number of different pure breed hogs, each with distinct characteristics.  A few of the heritage breeds include Berkshire, Mulefoot, Tamworth, Large Black, Hereford, Poland China, Chester White, Duroc, Hampshire, and Yorkshire.  There is even a breed, the Ossabaw hog, that is unique to the Georgia island of the same name.  Many of these breeds are considered a threatened species and so they can be hard to find.  Many tend to be smaller than grocery store hogs because they are raised on a natural diet with no hormones and never see the inside of a gestation crate.  Instead, they are free range hogs that live a stress-free life, making their meat all the better.  Their fat tends to be smooth and buttery when rendered and their meat is a much deeper red than the pale pink of grocery store meat, offering a flavor that is hard to beat.

My local butcher has Chester White hogs raised in NC.
The next day I paid a visit to my local butcher to ask about the pork that he had available.  He explained that his pork comes from a farm in North Carolina where they raise Chester White hogs.  Since then I have smoked five racks of baby backs and two pork butts and it truly has been the best ribs and barbecue I have ever done.  The price is only about a dollar a pound more and it is well worth it.  So from now on, there will be no grocery store swine for me.  The only pork to see the inside of my cooker is pork I can call by name!                             

Monday, July 21, 2014

The Search is Finally Over

As you all know, this blog has never been a place where I do restaurant reviews.  I am not a food critic nor have I ever claimed to be.  I prefer to share with you my stories and experiences cooking with wood in the backyard, hoping to challenge and inspire each of you to try something new on the grill. 

But over the past couple of months I have visited a few of the local barbecue restaurants hoping to learn something new about cooking with wood or at least walk away with a few new ideas for food I can cook on my grill at home.  And something very unexpected happened.  Instead of leaving inspired, I was left dumbfounded and disappointed.  These restaurants, which had been recommended by a number of people, were serving food that was just not good.  Ribs with no flavor, dry brisket reheated on the flat top, and vinegary mush that they were claiming to be pulled pork.  It just seemed that no one around here knew anything about cooking food with wood, until today.

A couple of weeks ago, as I followed my wife to the Honda dealership at 7:15 in the morning to drop off her car, I passed Swig and Swine and noticed smoke coming from the cooker out front.  I thought to myself. "Cooking at 7:15 in the morning seems pretty legit, I definitely need to try that place."  Well, today I ate there for lunch and I am sorry I didn't do it sooner.  I had the three meat plate with pork belly, turkey, and pulled pork and it was amazing.  I had collards and mac and cheese for sides and they were spot on too.  

Lucky for me, I was able to talk with partner and executive chef, Anthony DiBernardo, and he was gracious enough to share a little about how he is able to create such fantastic food.  From using only hickory, oak and pecan in his custom made, reverse flow cooker to using salt and pepper as the primary seasonings, this guy was speaking my language.  By keeping it simple and letting the wood do the work, the folks at Swig and Swine have a great thing going.  Meat cooked the right way, sides that are to die for, quality beer on tap, and fast, friendly service are what make this place so great.  If I'm not cooking it at home, I'm eating it at Swig and Swine!            


Thursday, July 10, 2014

What's Been on the Grill?

Most people would agree that summer is the best time to grill.  Although the evenings are hot here in the Lowcountry, the beverages are cold which means there really is no better time to cook with wood.  It stays light until almost nine, so there's plenty of time to sit on the back porch under the ceiling fan and enjoy the evening with good food and good friends.

Brussels sprouts in a cast iron skillet with olive oil, salt, and pepper.
There's been quite a variety of foods on my grill this summer.  The late spring, early summer is a great time for brussels sprouts and a cast iron skillet over fire is the best place to put them.  I toss them in a little olive oil, season them with salt and pepper, and cook them over a white-hot bed of lump charcoal with a couple of chunks of hickory.  The sprouts do very well with a little smoke flavor.


Corn grilled in the husk rubbed with a little butter.
One of the first things many of us cooked on the grill, whether with gas or charcoal, are hamburgers.  And I know there are millions of ways to do burgers on the grill, but I prefer ground chuck.  I make my patties big, but not too thick.  If they hang off the bun they're perfect!  I season them with a little salt, pepper, and cumin, and grill them over direct heat with lump charcoal and hickory chunks.  I flip them once and add a couple of pieces of bacon, a slice of sharp cheddar, and a slice of colby jack.  My kids describe them as "burger perfection!"


Folks come running when these are on the grill.
I'm always looking for a new appetizer I can throw on the Weber while the main dish is cooking on the big cooker.  A friend of mine found these gems and sent me the link to the recipe.  I just slice a sweet onion into rings, but instead of battering and frying them, I wrap them in bacon and grill them over direct heat until the bacon gets crispy.  To help keep them together, double up the rings.  This keeps them from getting too flimsy as they cook.


Sweet potatoes brushed with olive oil, seasoned with salt, and grilled.
It's been years since I have smoked a whole chicken.  So this Fourth of July I decided to do a couple of beer can chickens.  I brined these two birds overnight in a brine recipe from Alton Brown.  And then right before I put them on to cook,  I read an article about how the beer can chicken thing is a myth and a waste of good beer.  So I used the beer can holders to prop the birds up and smoked them at 325 degrees, without the beer can, until the internal temp of the breasts reached 165 degrees.  I then took them off and let them rest for about twenty minutes before I cut them and served them.  Best chicken ever!        

Wednesday, April 30, 2014

Meatloaf Bliss

Being a newlywed is a funny thing.  It's been a long time since my wife and I were marriage rookies, but as I think back to those early days, I can't help but remember it being a little awkward at first.  Although we dated for almost two years before getting married, we never lived together until after the wedding and so it felt a little like getting a new roommate in college. It took us a little while to figure out how to live together.  Who will do the laundry?  Who will do the yardwork?  What really is the right way to put lights on the Christmas tree?  I am messy, she is not.  Who will do the grocery shopping? Who will pay the bills?  What are we having for dinner?

What are we having for dinner?  A question that is still asked everyday in our house.  But back then, she and I quickly realized that each of us had a couple of meals that we could cook fairly well.  I had a little gas grill (amateur!) and could do burgers and steaks and every now and then a juicy piece of chicken.  I could also do spaghetti.  She had a bunch of her mom's casserole recipes, she could do lasagna (to this day it's the best lasagna I've ever had!) and she could do meatloaf.

I will never in my life forget the first time she ever cooked meatloaf.  I came home one evening to a loaf of meat cooking away in the microwave.  "Huh," I thought to myself.  "I've never seen meatloaf cooked in the microwave before."  But I went with it and to be totally honest, it tasted pretty good.  Apparently, that's how her mom had always cooked meatloaf.  But there was just something weird about cooking meatloaf in the microwave.

Fast forward a few years, the two of us had become fairly comfortable in the kitchen and we were having fun trying new dishes and playing around with recipes we found on the web.  One day my wife mentioned cooking meatloaf and I suggested we try something different.  I had just had a conversation with a guy at our church earlier in the week about meatloaf and he talked about how he used Ritz crackers instead of bread crumbs and it sounded excellent so I figured this might be the right time to take our meatloaf in a different direction (like towards the oven and away from the microwave!).  This began our journey to meatloaf perfection!

From the microwave, to the oven, and eventually to the grill, we just kept making it better, each time changing things up a little.  Less ketchup, more mustard, more crackers, less crackers, onions, bell peppers; you name it, we've tried it.  For a little while we were even wrapping the entire thing in bacon.  And eventually, after almost eight years of tinkering with one of America's most classic meals, we have achieved what our family considers Meatloaf Bliss.

In a large mixing bowl, combine two and a half pounds of ground beef, two eggs, two sleeves of crushed Ritz crackers, one sixteen ounce container of Garden Fresh Thick and Chunky Salsa, one can of strained and rinsed black beans, one can of strained and rinsed sweet corn, three tablespoons of mustard and two tablespoons of Worcestershire Sauce.  Divide the mix into two loaves and place the loaves on a cookie sheet and chill in the fridge for about thirty minutes.

While the loaves are chilling, fry half a pound of bacon and break the pieces up into bacon crumbles.  Then head out to the grill and get it set up for cooking with indirect heat.  Bring the grill temp up to 350 degrees and add a couple of chunks of hickory or pecan.  Before placing the loaves on the grill, top each loaf with a couple of handfuls of light brown sugar and the bacon crumbles.  You may have to lightly press the bacon crumbles into the loaves so they will stay in place.

Cook the meatloaves at 350 degrees until they reach an internal temperature of 165.  Remove them from the grill with a large spatula and let them rest for about twenty minutes before serving.

Thursday, March 27, 2014

Why Do I Cook With Wood?

I spend a lot of time cooking outside.  I also spend a lot of time talking with people about cooking food outside.  In fact, the only thing I love more than eating food cooked on the grill is sharing ideas, techniques, and stories with others about cooking with wood.  And in those conversations, many people ask the same questions.  "Wouldn't it just be easier to cook it in the oven?"  "Wouldn't it be quicker to cook on a gas grill?"  "Is it really necessary to cook everything on the grill?"

No, it's not necessary to cook everything on the grill but there are a couple of good reasons why I choose to cook most things on the grill.  First and foremost, I believe the food just tastes better. I find that the natural flavor that comes from wood is very appealing.  Does that mean that all food from my grill is super smoky in flavor?  Absolutely not.  Knowing when, how much, and what kind of smoke wood to add to your pile of hardwood lump charcoal is just as important as knowing what kind of seasoning works best with the dish you are creating.  The wood is part of the recipe.

Second, I like the challenge.  It is not easy getting a fire going and then manipulating the airflow through the cooker in order to dial it in to the perfect temperature.  It is something that takes a bit of practice but the more you grill, the better you know your cooker and can better achieve the exact temperature needed for the particular dish you are cooking.  

But even more than both of the previous reasons, I cook with wood because it takes time.  Cooking on the grill provides me with an excellent excuse to take a break from the rat race of life, stand on my back porch, enjoy a good beer, and create amazing food.  I truly believe that the greatest things in life take time.  If you don't invest time in your marriage, it will suck.  If you don't spend time with your kids, they will find other ways to spend their time.  If you don't set aside time to volunteer somewhere serving others, your life will be without meaning.  Food deserves our time too!

But I have failed.  I could come up with a hundred reasons why I haven't posted anything on this blog in well over a month; it's been cold,  it's been rainy, this is a busy time of year, it was getting dark too early; the list goes on and on.  But if I'm honest with myself I know the reason I haven't is because I haven't been intentional about making the time to do it.  It's that simple.

In the coming weeks I will be doing a better job of making time for the things that are important and for my family and me, food is one of those things.  I will be sharing with you the story of my wife's meatloaf and its journey from the microwave to the grill, I'm going to spend some time talking about hamburgers done the right way, and I will be cooking for a friend's birthday party and hope to get some great pictures of nachos, fajitas, and quesadillas on the grill.  I also have this little dream to soon begin selling my fajita seasoning, pork butt rub, rib rub, and house seasoning.  There's plenty of hoops to jump through before that happens but I'm going to try to get the ball rolling.

I am looking forward to a spring filled with the smell of smoke and good food and friends to share it with.  The Lowcountry really is an amazing place to live and am going to do everything possible to make time to enjoy it!

Tuesday, February 4, 2014

Cajun Monterey Ranch Chicken Wings


A couple of weeks ago I was poking around on the internet, trying to find something new and unique to cook for Super Bowl Sunday, when I came across a mind-blowing statistic. According to the National Chicken Council, North Americans will eat 1.25 billion wings on Super Bowl Sunday.  That's four wings for every person in this country.  It was immediately clear, I had to cook my chicken wings I had spent so long working to perfect.  You see, in 1995, we lived next-door to a guy named David. David had a tradition of cooking hot wings for the Daytona 500 and for years I watched in amazement as he crafted some of the best wings I have ever tasted.  Inspired by his masterpiece, I have spent the last several years sharpening my skills,  trying to create a wing recipe that is worthy of David's Daytona 500 bone-sucking wings.  

  
It all starts with two, four-pound bags, of wings.  I load my Primo Oval XL with about three handfuls of lump charcoal and four hickory chunks.  I have found, for a cook like this where I'm not trying to go low and slow, I use a handheld torch to light four different spots in my pile of lump.  I then place the chunks of hickory in the four spots that are not lit.  That way, I can bring the temp up without burning up my smoke wood.  I then drop my diffuser stones into place, put down my grates, clip my thermometer sensor to the grate, and close the lid.  I then bring the temp up to 300 degrees.  


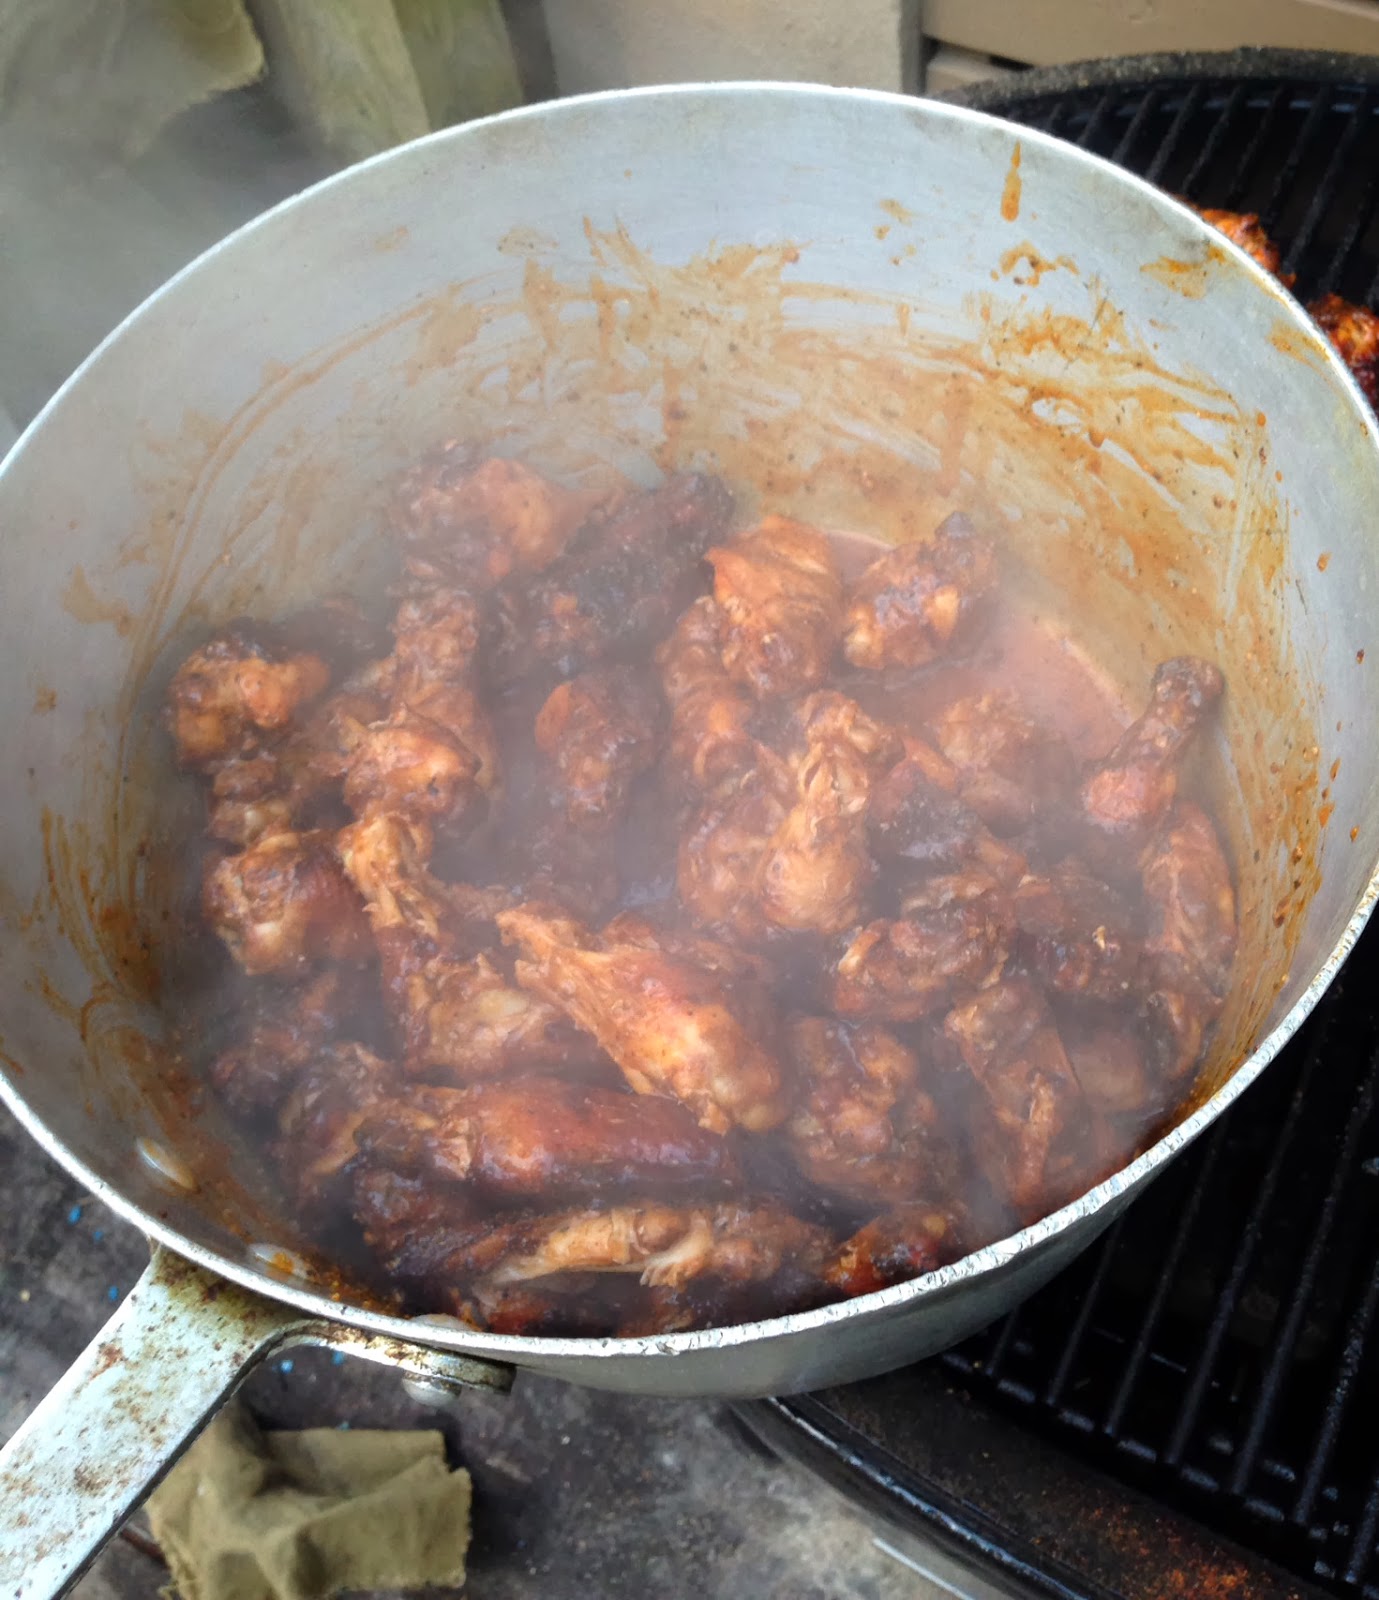
The trick to these wings is it involves a three-part flavoring process.  Begin by putting the wings on the grill and sprinkling on Swampy's Cajun Seasoning.  Let them cook for about thirty minutes and then flip.  Then sprinkle on the Monterey Ranch seasoning mix.  It is made up of a combination of Grill Master Monterey Seasoning and a packet of Hidden Valley Ranch Seasoning.  Cook the wings for thirty more minutes then soak them in a Texas Pete buffalo wing sauce.  Melt 1/2 stick of unsalted butter with the buffalo sauce. 


Put the wings back on the grill, to tighten them up, for an another ten minutes or until your desired crispiness.  At this point, it's perfectly fine to check on them frequently and take them off when the color and crispiness is where you want it.

Serve the wings with ranch, blue cheese and enjoy.