Tuesday, February 4, 2014

Cajun Monterey Ranch Chicken Wings


A couple of weeks ago I was poking around on the internet, trying to find something new and unique to cook for Super Bowl Sunday, when I came across a mind-blowing statistic. According to the National Chicken Council, North Americans will eat 1.25 billion wings on Super Bowl Sunday.  That's four wings for every person in this country.  It was immediately clear, I had to cook my chicken wings I had spent so long working to perfect.  You see, in 1995, we lived next-door to a guy named David. David had a tradition of cooking hot wings for the Daytona 500 and for years I watched in amazement as he crafted some of the best wings I have ever tasted.  Inspired by his masterpiece, I have spent the last several years sharpening my skills,  trying to create a wing recipe that is worthy of David's Daytona 500 bone-sucking wings.  

  
It all starts with two, four-pound bags, of wings.  I load my Primo Oval XL with about three handfuls of lump charcoal and four hickory chunks.  I have found, for a cook like this where I'm not trying to go low and slow, I use a handheld torch to light four different spots in my pile of lump.  I then place the chunks of hickory in the four spots that are not lit.  That way, I can bring the temp up without burning up my smoke wood.  I then drop my diffuser stones into place, put down my grates, clip my thermometer sensor to the grate, and close the lid.  I then bring the temp up to 300 degrees.  


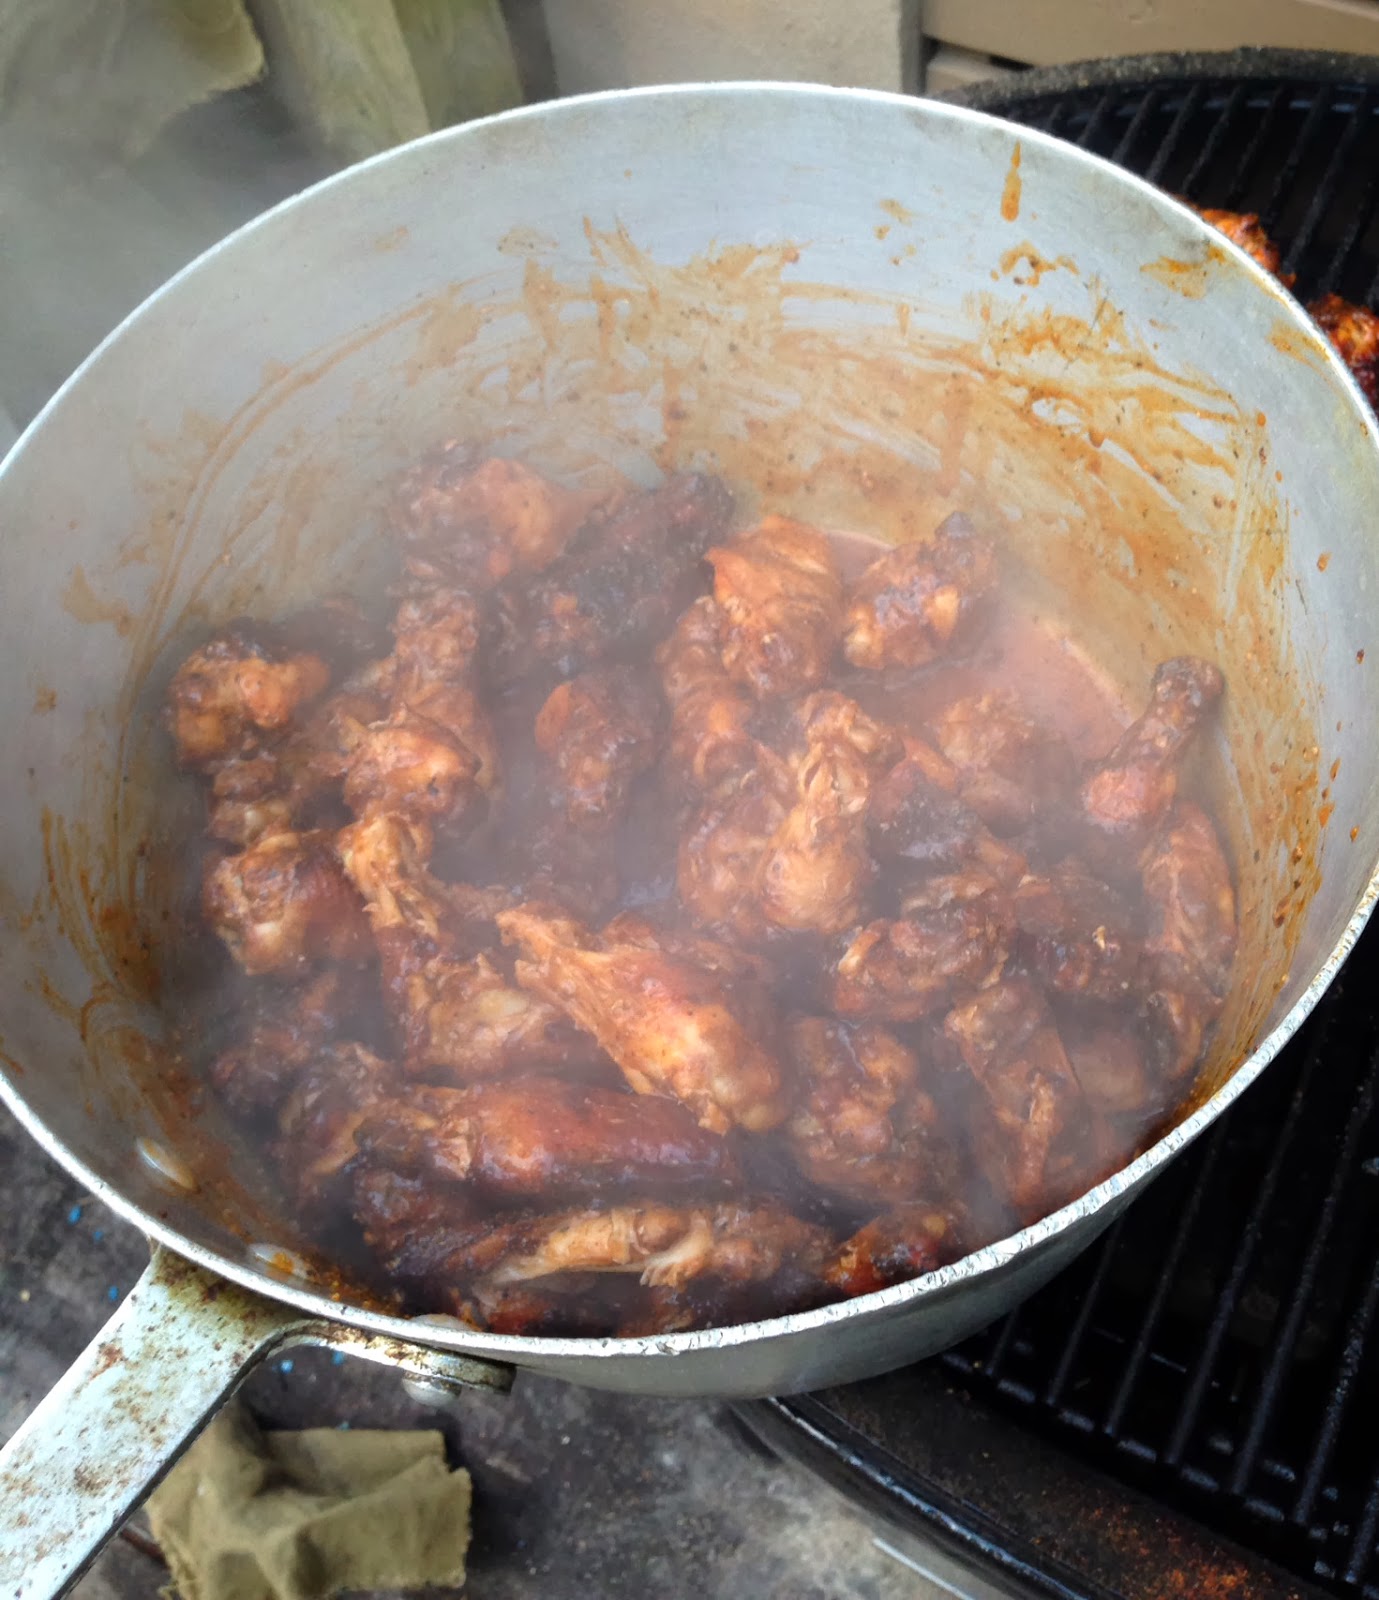
The trick to these wings is it involves a three-part flavoring process.  Begin by putting the wings on the grill and sprinkling on Swampy's Cajun Seasoning.  Let them cook for about thirty minutes and then flip.  Then sprinkle on the Monterey Ranch seasoning mix.  It is made up of a combination of Grill Master Monterey Seasoning and a packet of Hidden Valley Ranch Seasoning.  Cook the wings for thirty more minutes then soak them in a Texas Pete buffalo wing sauce.  Melt 1/2 stick of unsalted butter with the buffalo sauce. 


Put the wings back on the grill, to tighten them up, for an another ten minutes or until your desired crispiness.  At this point, it's perfectly fine to check on them frequently and take them off when the color and crispiness is where you want it.

Serve the wings with ranch, blue cheese and enjoy.

Thursday, January 30, 2014

Baby Back Ribs

I will never forget the first rack of ribs I smoked.  My best friend's brother was in town for Halloween and so we decided to smoke some ribs.  I had no clue what I was doing and I didn't bother reading anything about how other folks cooked ribs.  I mixed up a "rib rub" that I thought would be good, fired up the offset smoker box on my new horizontal cooker (I had just brought Mr. Draper's Grill back from Gulfport a month before), and we got to cooking.  We coated the ribs with our homemade rib rub and put them on the grill.  I remember adding a TON of hickory chunks to the fire so we would "get a good smoke."  I don't remember ever checking the temperature, or how long they cooked.  All I know is they cooked for a while, we added more hickory chunks so we would continue to "get a good smoke" and then we left to take my three daughters trick-or-treating.  When we got back, we took the ribs off and brought them in the house.  Now, you have to understand, my memory of that first rib cooking experience is a little fuzzy.  It was almost ten years ago, I didn't take any notes, and I really had no idea what I was doing.  But that first bite of rib has been permanently infused in my memory.  As I tried to sink my teeth into the leathery, smoky meat, I remember thinking to myself, "Ugh, I thought ribs should fall off the bone."  As I continued to pull and tear the meat from the bone, the heat hit me.  With tears streaming down my cheek, it occurred to me that I might have gone a little overboard with the red cayenne pepper in my "rib rub."  As I looked around, the faces of my buddy and his brother told the exact same story.  Fighting through the heat induced tears and sniffles, we gnawed and tore our way through two full racks of our first baby back ribs.  In the days that followed, I spent hours scouring the internet for tips and tricks on rubs, cooking technique, and sauces.  This was the beginning of my journey into the world of cooking ribs.

After almost ten years of tinkering with baby back ribs, both on a horizontal cooker and now on a kamado cooker, I think I'm pretty close to getting them dialed in.  My wife and children love them and I've never had any complaints from friends either.  For me, it all starts with the rub.  Like most of the rubs and seasonings I've created, I began by looking at a bunch of different recipes, some very complicated and some very simple, and then used the basics from those recipes as a place to start.  From there I experimented with different spices until I found a combination that I liked that also worked well with my sauce of choice, Williamson Brothers Barbecue Sauce.  My rib rub has a light brown sugar base and also includes dry mustard powder, onion powder, garlic powder, cayenne pepper, kosher salt and coarse ground black pepper, cumin, dried basil leaves, ground cloves and chipotle pepper.  After scoring the underside of the ribs with a knife, I give the ribs a good coating of rub, top and bottom.  I then head out to the grill and get the fire started.  I add a couple of chunks of hickory to the pile of lump charcoal, get my diffuser stones in place, and bring the temp up to between 250 and 275 degrees.  I try to stay closer to 275 but I'm perfectly happy anywhere in between.  

As I was doing my rib research years ago after our epic failure, I kept seeing folks refer to the 3-2-1 method for cooking ribs.  Basically it's three hours on the grill, two hours on the grill wrapped in foil, and then one more hour back on the grill without the foil.  Usually folks add liquid like beer or vinegar to the foil pouch during the middle two hours and then brush with sauce during the last hour.  For me, this was a great place to start.  As I experimented with different cook time combinations, there were instances where I undercooked them and the bone did not pull clean.  There were also times when I overcooked them and the meat had a mushy texture.  I have now tweaked it so that when they are done and have rested there is a clean rib bone but still a nice texture to the meat.  

For the first part of the cook, I let the ribs stay on about two-and-a-half hours.  I then wrap them in a foil pouch, add a little apple cider vinegar, and put them back on for about an hour.  I then unwrap them, brush them with Williamson Brothers Original, and put them back on for about another forty-five minutes.  I then take them off and let them rest for fifteen or twenty minutes in a cool oven.  

After brushing the ribs with your favorite sauce, putting them back on the grill for a little while will tighten them up and give them that beautiful mahogany color.  The smaller rack in the back is ready to come off but the larger rack needs a few more minutes to finish.  
    

Tuesday, December 10, 2013

Apricot Glazed Pork Loin Roast

The perfect balance of sweet, savory, and smoky.
My wife found this recipe last year in a cookbook called Best-Loved Holiday Recipes published by Meredith Corporation.  We had volunteered to host the staff Christmas party and she decided she wanted to try something new.  So she he pulled out this cookbook for the first time ever and thumbed through the pages until she came across this recipe.  When she said she wanted to try it I was a little worried because it was only a couple of days before the party, we were responsible for providing the meat, and I am not a big fan of cooking anything for the first time for an event.  But I have to say, it turned out amazing.  The first couple of times we made this dish we did it in the oven.  That's the way the recipe was written and my wife enjoyed cooking it in the oven.  Only when she suggested doing it on the grill did I jump at the chance to take this pork loin roast to the next level.  Smoke adds one more layer of flavor to an already incredible piece of meat. Honestly, the rub is what I like most about this recipe.  It makes the whole house smell like the holidays and it works perfectly with the apricot glaze.

Internal temp should read 135 degrees
Rub Recipe
One 3-pound boneless pork loin roast
One and a half teaspoons ground cumin
Half teaspoon garlic salt
Half teaspoon ground cinnamon
Half teaspoon ground ginger
Quarter teaspoon ground cloves

The Glaze
One cup of apricot preserves and three tablespoons of white wine vinegar.

Mix together all of the spices and rub generously over the entire pork loin.  Wrap it up in plastic wrap and let it chill in the fridge for a couple of hours.  Bring your grill temp up to 325 degrees, add a couple of chunks of hickory, remove the plastic wrap, put the pork loin on the grill, and let it cook over indirect heat until the internal temp. reads 135 degrees.  Should take about an hour or so.  

With about ten minutes left until the pork loin reads 135 degrees, preheat your oven to 325.  In a small sauce pan cook the apricot preserves and vinegar over medium heat until the preserves are melted, stirring frequently.  Remove from heat.  With the pork loin now off the grill, place the meat on a broiler pan and brush generously with the glaze.  Roast it in the oven for about 15 minutes.  Remove it from the oven and let it rest for about 15 or 20 minutes.  Slice it, brush on the rest of the glaze, and serve.    


Sunday, December 8, 2013

Thanksgiving on the Grill

War Damn Eagle!!!
Thanksgiving in our house is always pretty low key.  We very rarely travel, instead staying home to spend time together, just the five of us.  There are two parts to our Thanksgiving; we always cook a big meal together on Thanksgiving Day and then our focus shifts to the Iron Bowl on Saturday.  As Auburn fans, our house went crazy after that game, the remnants of toilet paper in our oak tree the only remaining evidence of our celebrations. Our win over that other team was one for the history books and was just about the only thing anyone wanted to talk about this past week.  

The other thing everyone wants to talk about after Thanksgiving is food.  I always love listening to people talk about the different dishes they served because many times the recipe is an old family recipe that's been made every Thanksgiving for years.  Ours is the same but this year we decided to change it up a little and cook all of those family recipes on the grill.  From the pecan and pumpkin pie to the cornbread, sweet potato casserole, and apricot glazed pork loin roast, we cooked it all with wood.  

When talking with folks this past week about cooking Thanksgiving on the grill everyone had the same question, "How?"  I'll tell you the same thing I told them, anything you'd cook in the oven you can cook on the grill.  It's all about temperature control.  As long as you know your grill well enough to know how to control the temperature, you can cook almost anything on the grill.

Grills have vents that control air flow which, in turn, control the temperature.  The more air you give the fire, the higher the temperature.  Whether you're cooking on a horizontal cooker, a kettle grill like a Weber, or a Kamado style cooker, they all have a vent to let air in and a vent to let air out and you can find the right combination of openings to keep the temperature wherever you need it to be.  Now, I understand that keeping the temperature constant for an extended period of time like eight or ten hours is easier on some cookers and really tough on others, but for dishes that require an hour or less, cook it on the grill!

In order to keep accurate control of the temperature, the most important piece of equipment you need is a good quality, digital thermometer with a sensor that sits at grate level.  This way you always know what is going on inside your grill without opening the lid.  I can't say enough about how much having a good thermometer will change the way you grill.

It all takes practice.  Nobody gets it right the first time.  Not even the second.  I still screw up food all the time but I learn from my mistakes and move on.  But having the right tools and knowing your grill can allow you to do some amazing things cooking with wood.  Don't be afraid to get creative. 

 Remember, if you'd cook it in the oven, you can cook it on the grill!             
                 

Monday, November 25, 2013

Fajita Butt Tacos

A while ago I decided it was time to create my own fajita seasoning. I had tried a couple of the store bought fajita spice mixes to season the chicken cutlets for my quesadillas but I just wasn't satisfied.  So I went online and searched "fajita seasoning" and looked through a bunch of different recipes.  Most of them were very similar and included salt, paprika, chili powder, sugar, garlic powder, onion powder, and usually cayenne pepper for some kick.  To the pantry I went, hoping I wouldn't have to make a trip to the store.  We had everything but the chili powder so I improvised and used the chipotle pepper spice I already had instead of going to the grocery store for chili powder. I also added black pepper and cumin.  After a little bit of tweaking here and there, this has become my go-to seasoning for the chicken, shrimp and steak that goes into tacos, quesadillas, nachos, and any other mexican/southwestern dish.

Then, a couple of weeks ago, I had another stroke of genius.  I was watching some barbecue competition show on tv and as each of the competitors was generously coating their huge cut of pork with their own special spice rub, I immediately thought of my fajita seasoning and wondered what it would be like on a smoked pork butt.  I had to try it!  So this past weekend I picked up a little four pound pork butt roast.  I gave it a good coating of my fajita seasoning, wrapped it in plastic wrap, and let it sit in the fridge overnight.  The next day I threw it on the smoker and let it go all day until the internal temp reached 200 degrees.  I let it rest for about an hour and then pulled it to be used in tacos.

While the butt was still resting, I put together a salad/relish kinda thing I discovered last summer in Honduras.  In a large mixing bowl I combined a bag of cole slaw, a diced red bell pepper, chopped fresh cilantro, the juice from one lime, and a little vinegar.  I seasoned the mix with salt, pepper, and cumin, and gave it a generous toss, making sure everything was mixed very well.  This stuff is even better the next day so I prefer to make it a day in advance so that the ingredients can hang out together in the fridge (I'm just not very good at planning ahead, didn't happen this time!).    

Once the fajita butt has rested and been pulled, I put a handful of it in the middle of a flour tortilla and top it with the Honduran salad.  These tacos are ridiculous!!!                 

Monday, November 18, 2013

Armadillo Eggs Down and Dirty

Down and dirty puts a perfect crisp on the bacon
The other day I was watching a show called Deep Fried Masters on Destination America.  It's a cooking competition that puts State Fair Vendors up against each other to see who is the real deep fried master.  I'm not a huge fan of the "deep fry everything" craze, in fact I think it's a little absurd, but that's what was on and just before I changed the channel, a particular dish caught my attention.  For the "food on a stick" category one of the competitors was cooking what he called Deep Fried Armadillo Eggs.  As I watched him assemble these little guys and drop them in the fryer, my first thought was, "Those look stupid good!" which was immediately followed with, "Those would be perfect to do down and dirty."

Soak the skewers in water to keep them from burning
This particular version of Armadillo Eggs consists of three ingredients, a block of pepper jack cheese, boneless, skinless chicken breasts, and bacon.  Start by slicing the chicken breast into pieces about an inch think.  Then, pound the chicken out until it is about four inches in diameter and about an eighth of an inch thick.  Season with salt, pepper, and cumin.  Wrap each piece of chicken around a small chunk of cheese, wrap the cheese and chicken with a slice of bacon, and use a bamboo skewer to hold it all together.

My new favorite food on a stick
Light a chimney starter full of hardwood lump charcoal and let it get white hot.  Dump the coals into your down and dirty cooker (see Cooking Down and Dirty) and then place a wire cookie cooling rack directly on the coals.  Blow off the ashes and then place the Armadillo Eggs down on the coals.  Flip the eggs a couple of times so everything cooks evenly.  Take the eggs off the coals when the bacon shell gets nice and crispy.  Let them rest for a couple of minutes before serving.                       

Monday, November 11, 2013

Banana Bread

Pecans + smoke = stupid good!
As my wife and I began exploring different things to do on the grill, her banana bread recipe was one of the first sweets we decided to try.  Pecans handle smoke well and so we figured this recipe might work. Well, let me tell you, we were right!  We've done muffins and bread and both do a great job of capturing just enough smoke to give it an unbelievable flavor.

Mix the following together in a large mixing bowl:

1 cup of sugar
1/2 cup of brown sugar
1/2 cup of softened butter
2 eggs
2 tablespoons milk
1 teaspoon baking soda
2 cups of all purpose flour
3 bananas, over ripened
1 teaspoon vanilla
1/2 teaspoon of salt
couple of handfuls of chopped pecans

Light a chimney full of hardwood lump charcoal and let it get white hot.  Dump it into the grill and add three or four chunks of hickory or pecan wood.  Bring the temperature up to 350 degrees.  Rub the inside of a loaf pan with butter and lightly dust with flour.  Pour in the mixture until the loaf pan is half full and sprinkle another handful of pecans on top.

So that the bread will cook evenly, I always cook with indirect heat using my stone diffuser.  Let the banana bread cook for at least 45 minutes before checking on it.  It may take an hour or so to cook so when a toothpick stuck in the middle comes out clean, take it off the grill and let it cool for about ten minutes before removing from the pan.